
Fall is in the air, and with it comes the tradition of fall cleaning. A once-a-year deep clean leaves your home sparkling and fresh for the holiday season, and it helps keep the house in good shape for the long haul. If the thought of a deep clean feels like a lot, don't worry! We've put together a fall cleaning checklist that breaks the job down into the top 7 tasks to get your home in tip-top shape.
I. Declutter Every Room
1. Start with a Decluttering Session:
Before you start cleaning, spend some time decluttering. Donate or toss anything you no longer need or use. A room with less clutter looks better, and every cleaning step after this one goes faster.
2. Dust from Top to Bottom:
Once your space is decluttered, it's time to tackle the dust. Start at the highest point in each room and work your way down, dusting surfaces, light fixtures, ceiling fans and window sills. Don't forget the spots people tend to skip, like door frames and baseboards.
3. Refresh Your Furniture:
Give your furniture some extra TLC by vacuuming the upholstery and cleaning any stains. Try a fabric refresh spray to get rid of odors. For wooden furniture, use a wood cleaner made for the job to bring back the shine and wipe off grime and fingerprints.
4. Deep Clean Carpets and Rugs:
Carpets and rugs pick up dirt, dust and allergens over time. Use a vacuum with a rotating brush to deep clean both. For tougher stains, rent a carpet cleaner or hire a professional service for a thorough clean.
5. Shine Your Windows:
Let the sunshine in by giving your windows a good clean. Start by dusting and wiping down the window frames. Then use a glass cleaner and a microfiber cloth to get streaks and fingerprints off the glass. Don't forget to clean your window screens, too.
6. Refresh Your Bedding:
Fall is a great time to freshen up your bedding. Wash your sheets, pillowcases and blankets on a hot cycle to get rid of dust mites and allergens. Air out your mattress and give it a good vacuum to clear out any lingering odors.
7. Deep Clean Your Kitchen:
The kitchen needs extra attention during fall cleaning. Start by emptying the fridge, wiping down the shelves and tossing anything that's expired. Clean your oven, stovetop and microwave thoroughly. Then sanitize the countertops, scrub the sink and clean out your cabinets while you're at it.
8. Scrub Your Bathroom:
Make your bathroom shine with a thorough scrub. Clean the toilet, bathtub, shower and sink with the right products for each one. Replace old or mildewed shower curtains and bath mats. Organize your toiletries and clear out the bathroom cabinets.
9. Polish Your Fixtures:
Take some time to polish the fixtures around the house. Use a gentle cleaner to wipe smudges and fingerprints off doorknobs, light switches and faucets. It's a small job, but it makes a big difference in how your home looks.
10. Don't Forget the Floors:
Finally, give your floors some love. Vacuum or sweep up loose dirt and debris first, then mop or deep clean. Use the right cleaner for hardwood, tile or vinyl floors, and follow the manufacturer's instructions for a thorough clean.
Decluttering every room should be the first task on your fall cleaning checklist. Clutter makes a space feel chaotic and overwhelming, and it makes cleaning harder. Clear it out first and you'll have a more organized room that looks better, too.
II. Clean Inside Kitchen Cabinets
1. Empty the Cabinets:
Start by emptying your kitchen cabinets. Take all the dishes, cookware and food off the shelves. With the shelves bare, you can reach and clean every corner of the cabinets.
2. Dust and Wipe Down:
Once the cabinets are empty, dust the inside surfaces. Use a microfiber cloth or a feather duster to pick up cobwebs, dust and crumbs. Pay special attention to the corners and edges of the shelves.
Next, mix warm water with mild dish soap, or make a mixture of vinegar and water. Dip a clean cloth or sponge into the solution and gently wipe down the inside of the cabinets. That takes care of sticky residue, grease and stains. Be sure to wipe the back and sides of the shelves and the inside panel of the cabinet doors.
3. Tackle Grease and Grime:
Kitchen cabinets build up grease and grime over time, especially near the stovetop or wherever you cook with oil a lot. For stubborn grease or sticky residue, you may need something stronger. Mix equal parts vinegar and water or use a mild degreaser to break down the grease. Put the solution on a cloth or sponge and clean the greasy areas with gentle circular motions. Then rinse with a clean damp cloth to get rid of any residue.
4. Organize and Declutter:
While you're cleaning, declutter and organize what goes back in. Throw out expired food and products you don't use anymore. Donate or give away kitchenware that's in good condition but hardly ever gets used. It's also a good time to look at your storage needs and invest in organizers or shelving units to make the most of the space.
5. Let it Dry and Reassemble:
Let the cabinets air dry completely before you put anything back. Moisture trapped inside closed cabinets can lead to unpleasant odors or mold. Once they're dry, put your dishes, cookware and food back into the clean, organized cabinets.
Put "clean inside kitchen cabinets" on your fall cleaning checklist and you'll end up with a sparkling, hygienic kitchen. Be patient and get into every nook and cranny. A clean, organized kitchen looks more inviting, and cooking and meal prep go a lot more smoothly.
III. Scrub Bathroom Tile Grout
In a bathroom deep clean, the tile grout often needs special attention. Over time, grout gets discolored, collects dirt and can even grow mildew, and the whole bathroom looks less clean because of it. Set aside some time to scrub the bathroom tile grout and you can bring back its original brightness. Here's how to do it:
1. Gather Your Supplies:
Before you start, make sure you have everything on hand. You'll need a stiff-bristle brush or an old toothbrush, a grout cleaning solution, vinegar, baking soda, water and a clean cloth or sponge. Protective gloves are a good idea, too, to keep your hands safe.
2. Pre-Treat the Grout:
Spray the grout with a grout cleaning solution or a mix of equal parts vinegar and water. Let it sit for a few minutes to loosen dirt and grime. After this pre-treatment, stubborn stains and build-up scrub away with less effort.
3. Scrub Away:
Scrub the grout lines back and forth with a stiff-bristle brush or an old toothbrush. Use gentle pressure so you don't damage the tile or grout. Work on one small section at a time. If you hit a stubborn stain or discoloration, sprinkle a little baking soda on the grout lines and scrub hard. Baking soda is mildly abrasive, so it helps break down tough stains.
4. Rinse and Wipe:
After scrubbing, rinse the grout lines with clean water to wash off any leftover cleaning solution or baking soda. Wipe up the extra water with a clean cloth or sponge. Change the rinse water often so you aren't spreading dirt back onto the grout.
5. Prevent Future Build-Up:
A few habits will keep your grout clean longer. Once the grout is thoroughly clean, think about applying a grout sealer. It forms a protective barrier that helps repel dirt, stains and moisture, so the next cleaning goes faster. Also get in the habit of wiping down your tiles regularly with a mild cleaner and a soft cloth to stop build-up and keep your grout looking fresh.
6. Consider Professional Help:
If your grout is badly stained or has build-up you can't remove on your own, it may be time to call in professionals. Tile and grout cleaning experts have specialized tools and solutions for even the toughest grout problems.
Work in small sections, rinse off the extra solution and keep up with sealing and wiping so the build-up doesn't come back. With a little effort, you'll have sparkling grout and a better-looking bathroom.
IV. Dust Ceiling Fans and Light Fixtures
Ceiling fans and light fixtures often get missed in a deep clean. Dust builds up on them, which looks bad and also cuts down on the light and airflow they give off. Dusting your ceiling fans and light fixtures regularly keeps your home cleaner and healthier. Here's how to dust and clean them:
1. Gather the Necessary Supplies:
Before you start, gather what you'll need. You'll want a step stool or ladder so you can reach high fixtures safely. You'll also need a microfiber cloth or duster, a vacuum cleaner with a brush attachment, a pillowcase (for ceiling fans) and a cleaning solution that's safe for your light fixtures.
2. Turn Off the Power and Allow Fixtures to Cool:
Always turn off the power before you clean an electrical fixture. For light fixtures, turn off the matching switch in your circuit breaker. For ceiling fans, switch them off with the control panel or wall switch. Let the fixtures cool down completely so you don't get burned.
3. Dust the Ceiling Fan Blades:
Start by gently wiping the loose dust off the blades with a microfiber cloth or a duster. Here's another trick: slide a pillowcase over each blade and slowly pull it back so the dust ends up inside the case. That way the dust doesn't fall onto the floor or the furniture below.
4. Vacuum Away Loose Dust:
After dusting, use a vacuum cleaner with a brush attachment to carefully pick up any remaining dust or debris from the fan blades, the motor housing and anything else you can reach. Take your time and be thorough. Don't press too hard, and don't touch any electrical components.
5. Clean Light Fixtures:
For light fixtures, start by removing any shades, bulbs or panels following the manufacturer's instructions. You can wash the shades or glass panels with warm, soapy water and a soft cloth. Skip abrasive materials and strong cleaners, since they can damage them. Wipe down metal fixtures with a cloth dampened with the right cleaning solution.
6. Reassemble and Restore Power:
Once the fixtures and shades are clean and dry, put them back together following the manufacturer's instructions. Make sure they're securely fastened and lined up properly. Then turn the power back on by flipping the switch in the circuit breaker or using the wall switch.
7. Regular Maintenance:
To keep dust from building up on your ceiling fans and light fixtures, dust them regularly, ideally once a month or as needed. That keeps them clean and working the way they should.
Clean fans and fixtures look better and work better. Keeping up with them will also improve the air quality in your home. So grab your supplies, take a few extra minutes and give these often-forgotten spots some attention.
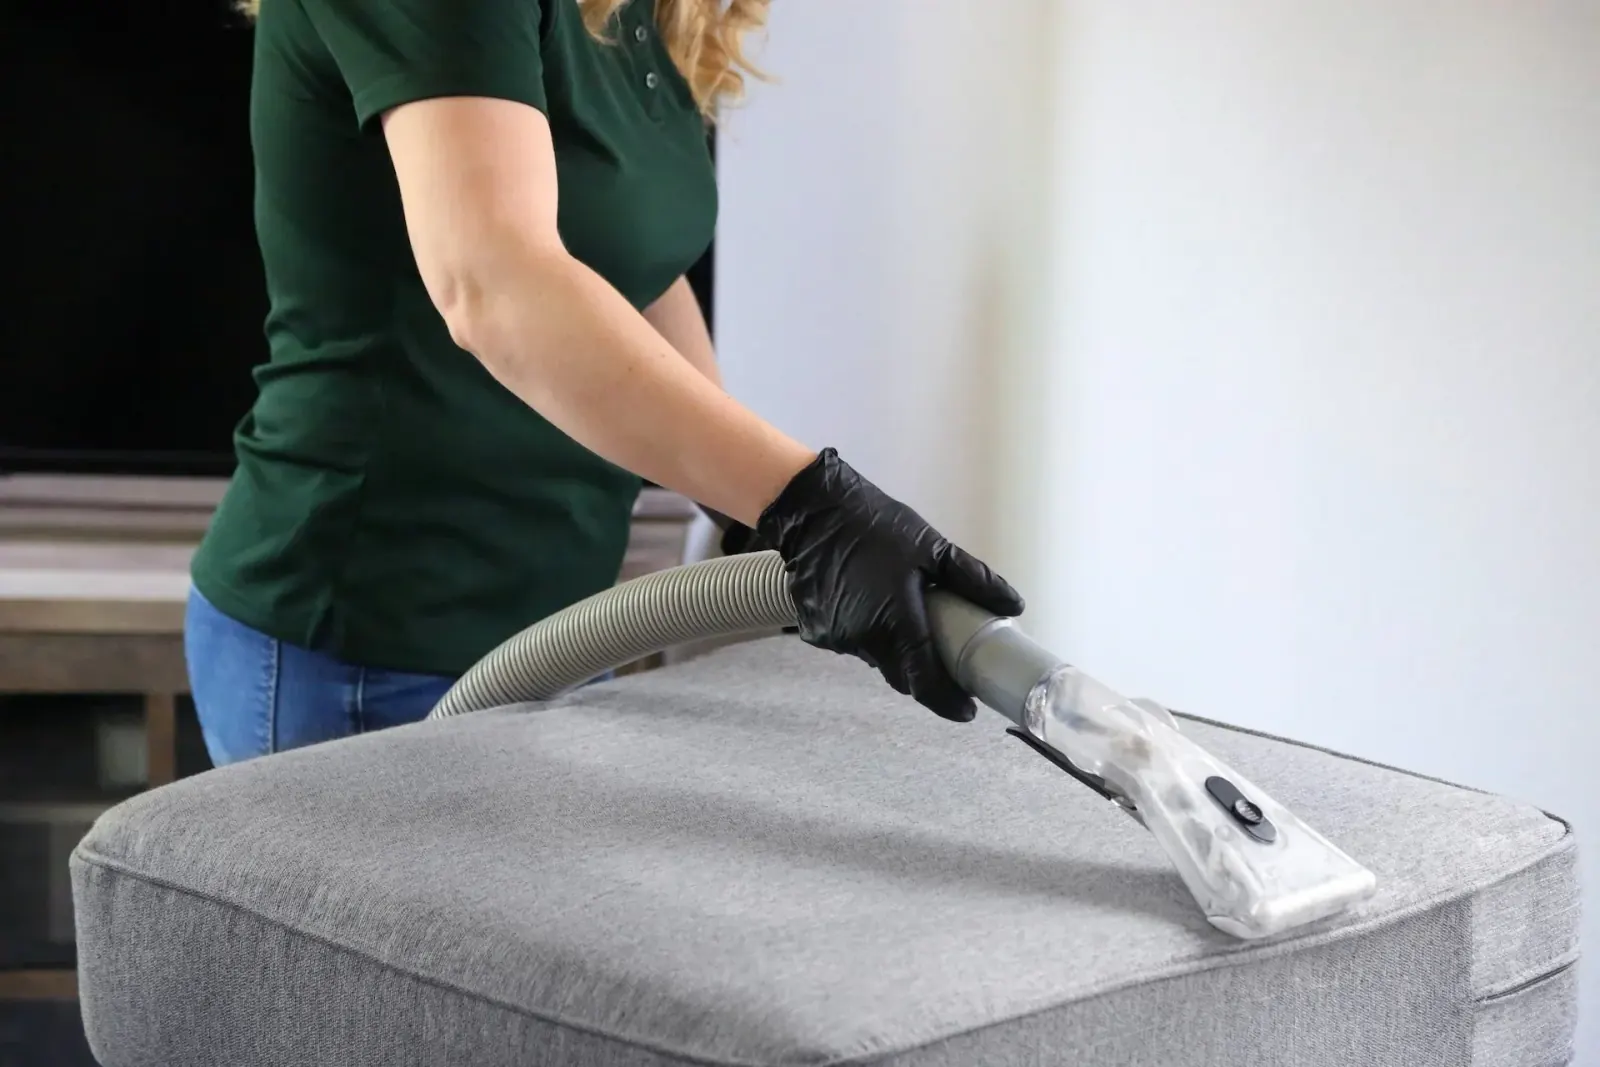
V. Vacuum and Flip Furniture Cushions
1. Before you begin, gather your supplies. You'll need a vacuum cleaner with a brush attachment, a soft-bristled brush or upholstery brush and a clean cloth or microfiber cloth.
2. Remove Loose Debris:
Start by clearing loose debris off your furniture cushions. Use your hands or a soft-bristled brush to gently brush away crumbs, pet hair and dirt. If you need to, use a handheld vacuum or a lint roller to pick up the smaller bits.
3. Vacuum the Cushions:
Next, put the brush attachment on your vacuum cleaner and vacuum the cushions thoroughly. Do the front and back first, paying special attention to crevices and seams. Use overlapping strokes and work in a set pattern so you cover the whole cushion. Press the brush gently into the fabric to loosen dirt and dust that's worked its way in.
4. Vacuum Upholstered Furniture:
While you're at it, vacuum the rest of your upholstered furniture. Run the vacuum over every surface you can see, including the arms, backrests and sides. That picks up loose debris before it can settle back onto the freshly cleaned cushions.
5. Flip the Cushions:
After vacuuming, it's time to flip the cushions. Flipping spreads out the wear and tear so your cushions last longer. If your cushions are reversible, flip them over completely or rotate them so the side that was facing down is now facing up.
6. Address Stains or Spills:
If you find stains or spills along the way, deal with them right away. Blot the spot gently with a clean cloth or microfiber cloth to lift as much as you can. Don't rub, since rubbing can spread the stain or set it into the fabric. For tough stains, check the manufacturer's cleaning instructions or think about a professional upholstery cleaning service.
7. Preventive Measures:
To keep your furniture cushions clean longer, use protective covers or slipcovers, especially if you have pets or kids. Rotating and flipping your cushions regularly and keeping food and drinks away from the furniture also help prevent stains and heavy wear.
Make vacuuming and flipping your furniture cushions part of your cleaning routine and your living space stays tidy and comfortable. Your furniture looks better, and you keep allergens down at the same time. So grab your vacuum cleaner, give your cushions some attention and enjoy furniture that looks and feels fresh again.
VI. Clean Out the Garage
The garage often needs special attention during fall cleaning. Over time, it turns into a catch-all for clutter, things nobody uses, dust and dirt. Cleaning out the garage gives you an organized space that works for you and a proper place to store your belongings. Follow these steps to clean out your garage:
1. Plan and Prepare:
Before you start, make a plan for cleaning out the garage. Set aside the time and gather supplies like gloves, cleaning solutions, garbage bags, storage bins and labels. Set up zones in the garage for categories like tools, sports gear, gardening equipment and so on.
2. Declutter and Sort:
Start by decluttering your garage. Take out everything that doesn't belong there or hasn't been used in the past year. Sort the items into groups by what they're for. Then you can see what you really need and what can be donated, sold or thrown out.
3. Clean the Space:
Once the garage is decluttered, it's time to clean it thoroughly. Sweep or use a leaf blower to clear out loose dirt and debris. Knock down cobwebs and dust from the walls and ceiling with a broom or a long-handled duster. Wipe down workbenches, shelves and storage units with a mild cleaner and a rag.
4. Deep Clean the Floor:
Garage floors pick up oil stains, dirt and grime. Try a power washer or a strong cleaner made for garage floors. Scrub stubborn stains with a stiff-bristled brush before you rinse the floor. Let the floor dry completely before you move anything back into the garage.
5. Organize and Store:
Now that the space is clean and clear, it's time to organize and put your things away. Use shelves, pegboards, hooks and storage bins to give each type of item its own spot. Keep the things you use often within easy reach, and put the rest in labeled bins or on higher shelves.
6. Maintain Your Organization:
To keep your garage clean and organized, set up a routine to tidy it regularly. Don't let clutter pile up, and put things back in their spots after you use them. Clean the floor and surfaces regularly so dust and dirt don't build up.
7. Dispose of Hazardous Waste Properly:
If you come across hazardous waste such as old paint cans, chemicals or expired gas cans, make sure to get rid of them properly. Contact your local waste management facility or recycling center to find out how to dispose of them safely and protect both the environment and your wellbeing.
Once you're done, you'll have a garage that's organized and easy to use. Keep up with the tidying and decluttering and the next clean-out will take a lot less work. The garage will stay a pleasant place for storage and activities, too.
VI. Detail Clean Appliances Inside and Out
Your fall cleaning routine should include a thorough cleaning of your appliances, inside and out. Appliances collect dirt, grease, residue and even bacteria over time, and that hurts both how well they work and how clean they are. A detailed cleaning can help your appliances run more efficiently and last longer, and it keeps your home healthier. Follow these steps to clean your appliances:
1. Gather Your Supplies:
Before you begin, gather what you'll need. That may include a microfiber cloth, a soft-bristled brush, a sponge or scrub brush, a mild cleaning solution (like dish soap or vinegar), baking soda and a vacuum cleaner with a brush attachment.
2. Start with the Refrigerator:
Begin with the refrigerator. Take everything out and throw away anything expired or questionable. Remove the shelves, drawers and door bins and wash them in warm, soapy water. Wipe down the inside with a mix of warm water and mild dish soap. Pay attention to the shelves, door seals and crisper drawers.
For stubborn stains or odors, make a paste of baking soda and water and spread it on the problem spots. Let it sit for a few minutes, then scrub gently with a sponge or soft-bristled brush. Rinse and dry every piece thoroughly before you put it all back together.
3. Clean the Oven and Stovetop:
Burnt-on food and grease splatters need to come off the oven and stovetop. Check your oven's owner manual for how to clean the inside safely. If you have a self-cleaning oven, follow the manufacturer's instructions. To clean the stovetop, wipe away loose debris, then take off the burner grates and knobs. Wash them in warm, soapy water or use a cleaner that's safe for them. Scrub the stovetop with a non-abrasive sponge and a mild degreaser to get rid of stubborn stains and spills.
4. Scrub the Dishwasher:
To clean the dishwasher, clear any food debris from the filter or trap at the bottom. Then wipe down the inside with a soft cloth or sponge dampened with warm water and vinegar. Pay attention to the door gasket and the spray arms. For a deeper clean, run a cycle with a dishwasher cleaner, or use baking soda and vinegar as a natural alternative.
5. Tackle the Microwave:
For the microwave, fill a microwave-safe bowl with water and a few slices of lemon or a tablespoon of vinegar. Heat it in the microwave for a few minutes until it steams. Leave it there a couple of minutes so the steam can loosen dirt and grime. Carefully take out the hot bowl and wipe down the inside with a microfiber cloth or sponge. Don't forget to clean the turntable and wash any removable parts.
6. Clean Small Appliances:
Unplug smaller appliances like toasters, blenders and coffee makers before you clean them. Take off any removable parts and wash them in warm, soapy water. Be careful around electrical parts and control panels, and keep them dry.
7. Don't Forget the Washer and Dryer:
Your laundry appliances need a deep clean, too. For the washer, run a cycle with a washing machine cleaner or use a mix of vinegar and baking soda to clear out residue and odors. Wipe down the detergent dispenser and the door seal.
For the dryer, clean the lint trap thoroughly after each use. Vacuum the lint buildup from the exhaust vent outside the house. Wipe down the drum and controls with a soft cloth. Check the dryer hoses for build-up or blockages and clean them if you need to.
Detail cleaning your appliances keeps them running well, helps them last longer and keeps your home clean and healthy. Check each appliance's manual for its own cleaning instructions, and put safety first whenever you work on electrical appliances.
VII. Freshen Up Lighting and Lampshades
Freshening up the lighting and lampshades belongs on your fall cleaning list, too. Dust and dirt build up on light fixtures and lampshades over time, so the light gets dimmer and the room looks dull. A little attention brightens up your rooms and makes them feel clean and inviting.
1. Safe Preparation:
Before any cleaning job that involves lighting, turn off the power so nobody gets hurt. Turn off the light switch and, if needed, switch off the circuit breaker for the fixture you're working on. Let the bulbs and fixtures cool before you handle them.
2. Dust Light Fixtures:
Gently dust your light fixtures with a microfiber cloth or a soft feather duster. Pay attention to the detailed trim, corners and crevices where dust collects. If your fixtures have glass or crystal parts, use a glass cleaner or a mix of vinegar and water to get rid of fingerprints and smudges. Don't spray liquid straight onto the fixture. Spray the cloth, then wipe the fixture clean.
3. Clean Lampshades:
Lampshades collect a surprising amount of dust, especially fabric or pleated ones. Start by taking the lampshade off the lamp base (if you can). Use a soft brush attachment on your vacuum cleaner to gently pull loose dust off the surface of the lampshade. Work from top to bottom in circular motions.
For fabric lampshades, lightly dampen a microfiber cloth or sponge with water or a mild dish soap solution. Carefully wipe the lampshade from the top down. Don't soak the fabric, and be gentle with any delicate materials. Let the lampshade air dry completely before you put it back on the lamp base.
4. Evaluate and Replace Bulbs:
While you're cleaning your light fixtures, check the condition and brightness of your light bulbs. Replace any that have burned out or give off a dim light. Think about swapping traditional incandescent bulbs for energy-efficient LED bulbs, which last longer and use less electricity. You'll get better light and save money on energy bills.
5. Declutter and Reorganize:
While you're freshening up your lighting, declutter and reorganize your lamps and other lighting accessories. Get rid of any lamps you no longer use or that don't fit your current décor. Try moving your lamps around so the room feels more balanced and looks better.
6. Embrace Natural Light:
Along with cleaning your lamps and fixtures, let in as much natural light as you can. Open the curtains and blinds during the day. The room will feel brighter and more uplifting.
Freshening up your lighting and lampshades makes your whole home look cleaner and feel nicer. Clean them regularly and your light fixtures and lampshades will stay in good condition and give you the light you want.
Get Help With Your Fall Cleaning
Work through these 7 tasks and you'll have a deep-cleaned home that feels fresh and inviting, plus a head start on keeping it cleaner and more organized.
If you'd like help with any of these tasks, or with other cleaning services, ask a professional cleaning service for a quote. All Seasons Cleaning has the expertise and resources to tackle even the toughest cleaning challenges.
So take a moment and request a quote from a trusted cleaning service like All Seasons Cleaning. Sit back, relax and let the professionals handle the rest while you enjoy a clean, fresh home. Give us a call at 727-768-9522.
We hope this fall cleaning checklist helps. Happy cleaning!